
Hello! Welcome to the Spring/Summer Idea Book blog hop hosted by the Rose Blossom's Team!
If you just came from the talented Tammie's blog you are on the right path. Hop along with us to see loads of inspiration from this talented team! We are so happy you joined us!
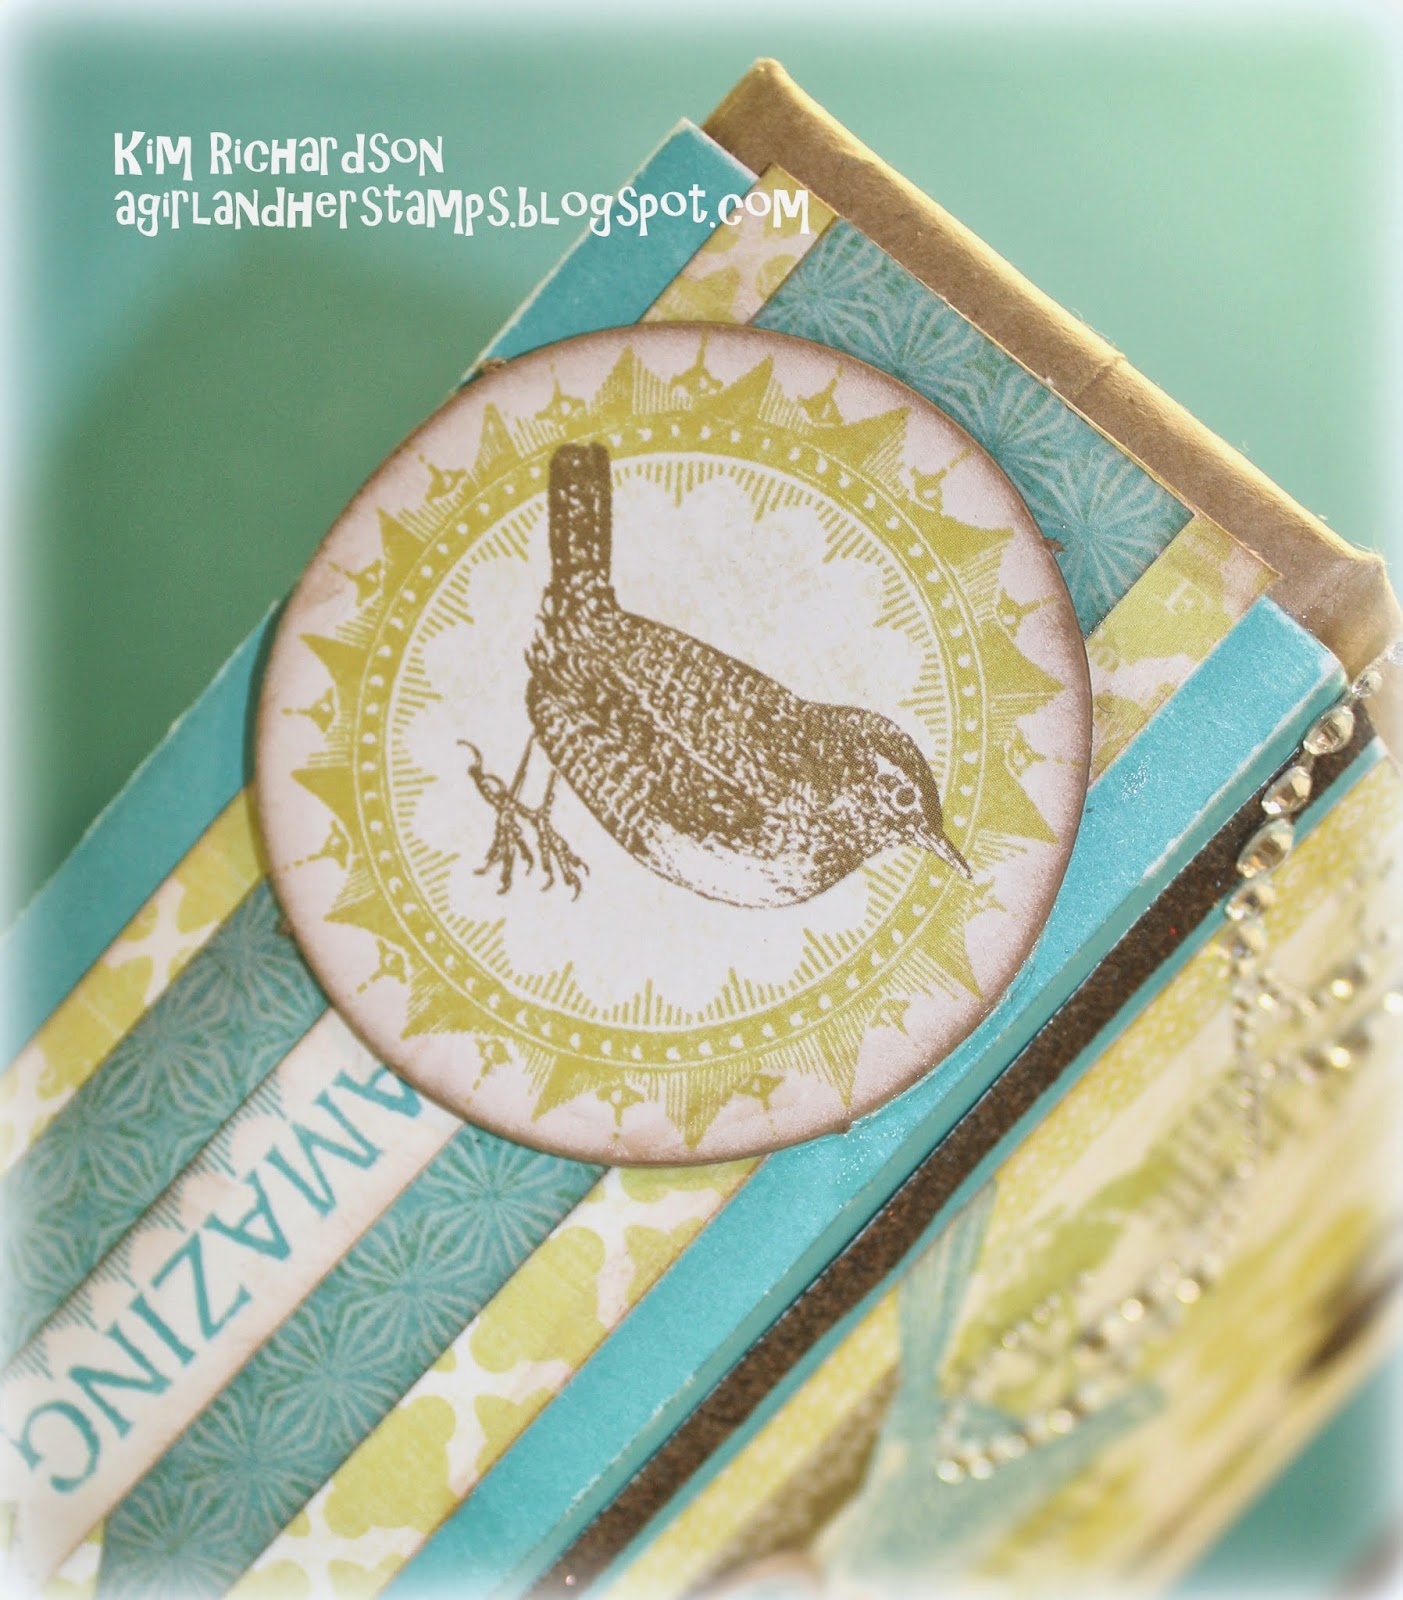
For this blog hop I constructed a Envelope Mini Album from scratch using the beautiful Skylark paper pack. The main components of this album are: Chipboard, Kraft Cardstock, Skylark Paper pack (CTMH), Skylark Dimensional Elements (CTMH) and Liquid Glass (CTMH).
The binding method used on this album is "Stack the Deck + One". There are a total of 7 pages with envelopes slots on each side to tuck in another area to journal or place photos. (I can't wait to put black and white pictures of our family in this!!) This was super fun to make!
YouTube tutorials I used are: (you may need to copy and paste into url)
- Pages- http://www.youtube.com/watch?v=ZhOw5WOWloE- My Sisters Scrapper
- Binding and Cover- http://www.youtube.com/watch?v=n9sKPczxH1o
- Stack the Deck + One- http://www.youtube.com/watch?v=xYpCgPqPaJE


Thank you so much for stopping by! Now you are off to Kristine's blog where I'm sure she has a beautiful project to share with you!
Happy Hopping! Kim :)
Material Used (all CTMH unless noted): CTMH products can be purchased HERE!
- 12 x 12 Chipboard- found a 12x12 sheet in my hoards of supplies :)
- Kraft Cardstock- retired- under while supplies last 6x6 envelopes are $1.50 and they work!
- Skylark Paperpack
- Skylark Deminsional Elements
- True to Life Stampset
- Art Philosophy
- "Celebrations" stampset that comes with Art Philosphy
- Juniper Ink
- Chocolate Ink
- Sweet Leaf Ink
- Desert Sand Ink
- 3D Foam Tape
- Liquid Glass- be prepared to use a lot!
- 4 Sided sanding block for distressing
- Hexagons Irresitibles
- Teal Shimmer Trim
- Bronze Shimmer Trim
- Sparkles Clear Flourishes- Small
- Opaque Pearls- retired
- Micro-tip Scissor- retired
What a great Project Kim!!! Absolutely Gorgeous!!!
ReplyDeletefabulous project love it :)
ReplyDeleteKim this is super super fun!! What a great idea! You have included so many details and I enjoyed looking at each photo ever so closely. Love love love!!!
ReplyDeleteI adore your album, Kim! All of the little details make it so special! I know someone will love filling it with photos for a treasured keepsake. I really, really love Skylark!
ReplyDeleteI have spent so much time looking through the pages,and I am AMAZED at the work and the detail that went into this GORGEOUS project!
ReplyDeleteYou are creative and oh-so wonderfully talented, and I appreciate how you share with your Rose Blossom sisters!!
It appears that you and Skylark hit it off quite well! This is really a great little project. Thanks for sharing those links. One thing I've always loved about your work is your knack for adding the perfect little details here and there. Keep it up Kim .... you inspire us!
ReplyDeleteThis is soooooooo gorgeous!! LOVING the colors and all the extra details you added!!!!!!!
ReplyDeleteLOVE! I may have to try this! :)
ReplyDeleteOh I love skylark even more now!
ReplyDeleteThis is over the top darling! Great work Kim! You have a natural talent with creativity....thank you so much for sharing your ideas and projects with us. An inspiration!
ReplyDeleteHOLY COW!!!! This is absolutely amazing! I so enjoy seeing what you create. Thanks for sharing your wonderful talent!
ReplyDeleteThis is FAB-U-LOUS!!!!
ReplyDeleteMy vintage-loving Krafty heart loves this project. I am anxious to check those videos. The envelope mini intrigues me. You showcased Skylark in a beautiful, artistic way. So many sweet, little details.
ReplyDeleteAwesome little mini. tfs.
ReplyDeleteAwesome album!! Gonna try this :). Question - how did you prepare the envelopes? Did you seal them and then cut an opening??
ReplyDeleteHi Caroline, I cut them from kraft card stock but kraft envelopes would work too....if you are using the same binding method cut about an 1/8 inch off on both sides. Have fun creating it and thanks for stopping by!
DeleteThis is great. love it.
ReplyDelete